Once again, I am writing a review about a Viper Tech (#4 for me...). This review will be covering the Viper Tech SR-16E3 MOD1. As many of you know I have written two other reviews of earlier Viper Techs, both of which can be found on these forums and the Viper Tech website. In this review I will be going over every aspect of this replica so be prepared to do some reading.
2011 Viper M4 Review:
2012 Viper XM177E1 Review:
So let`s get this thing started.
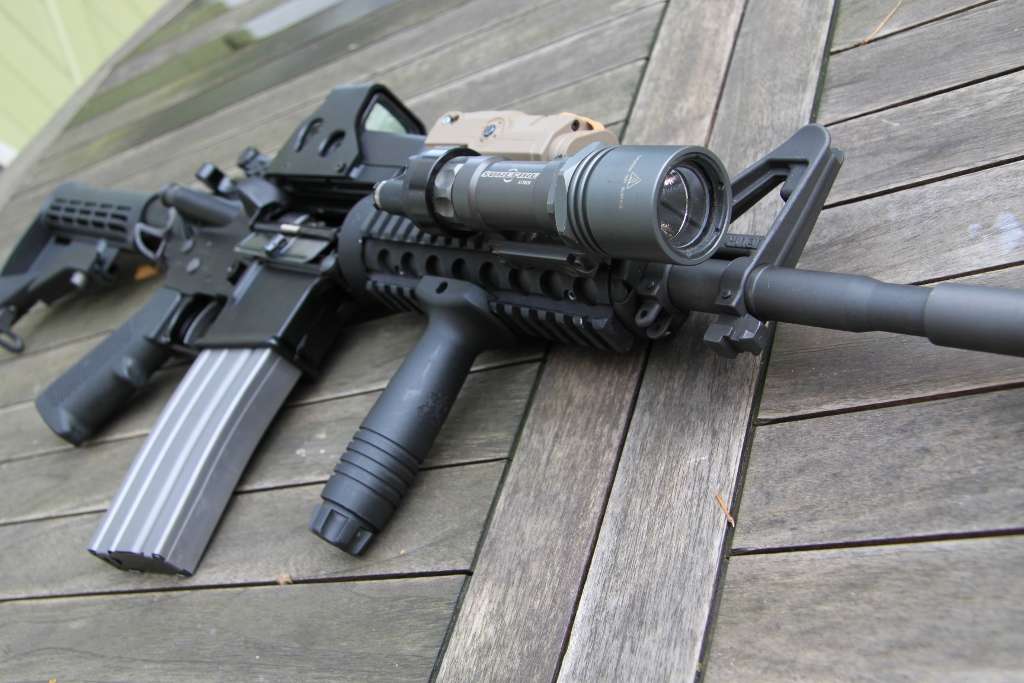
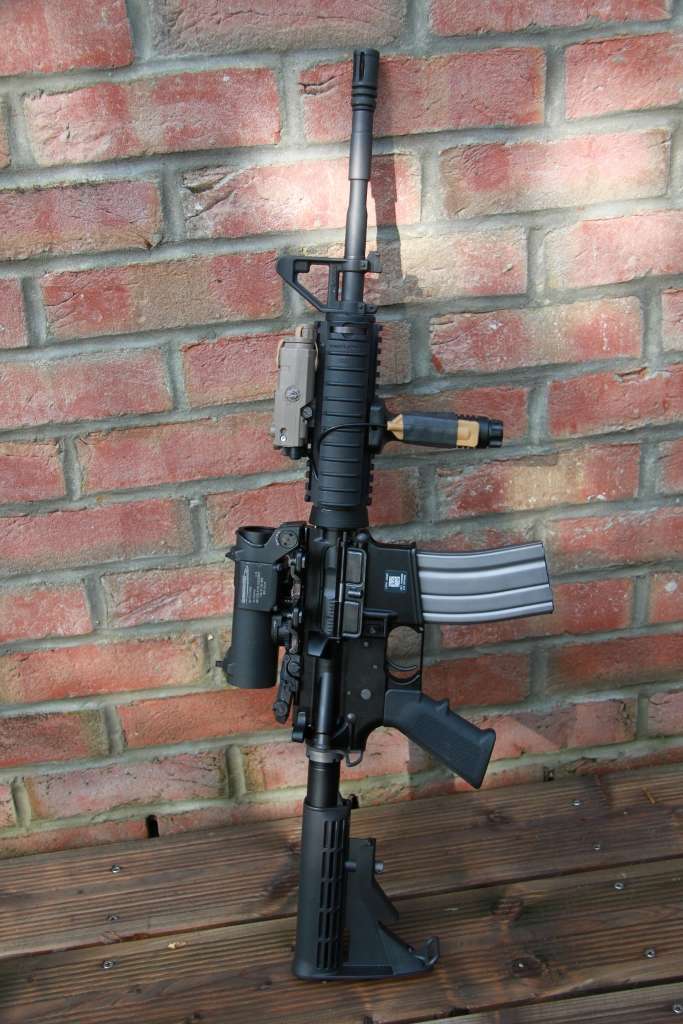
THE GUN
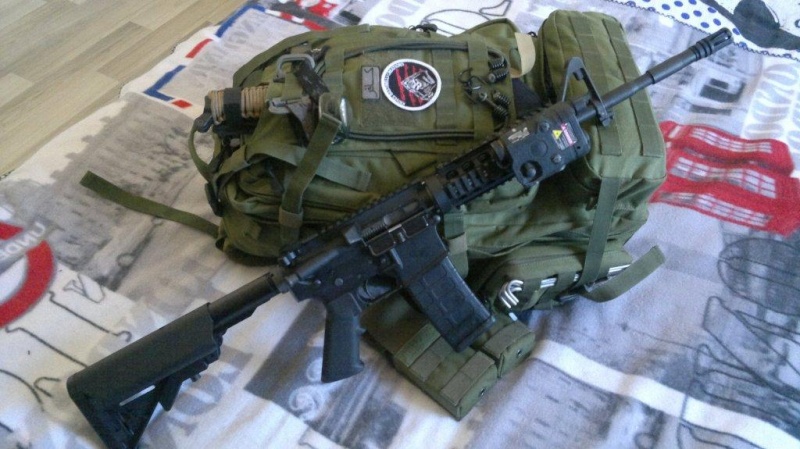
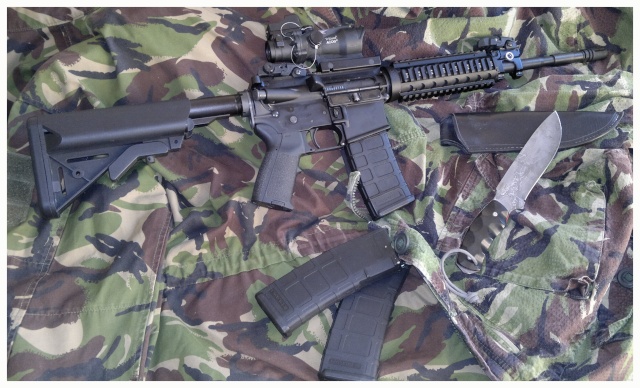
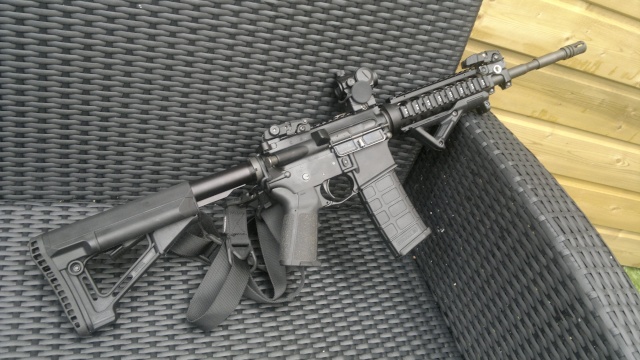
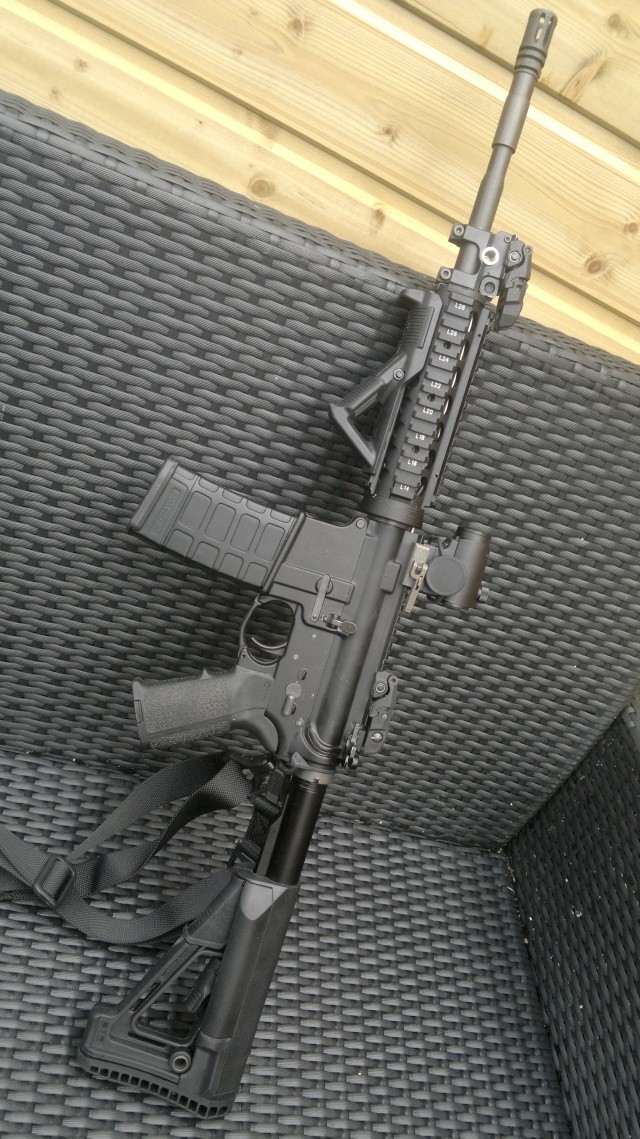
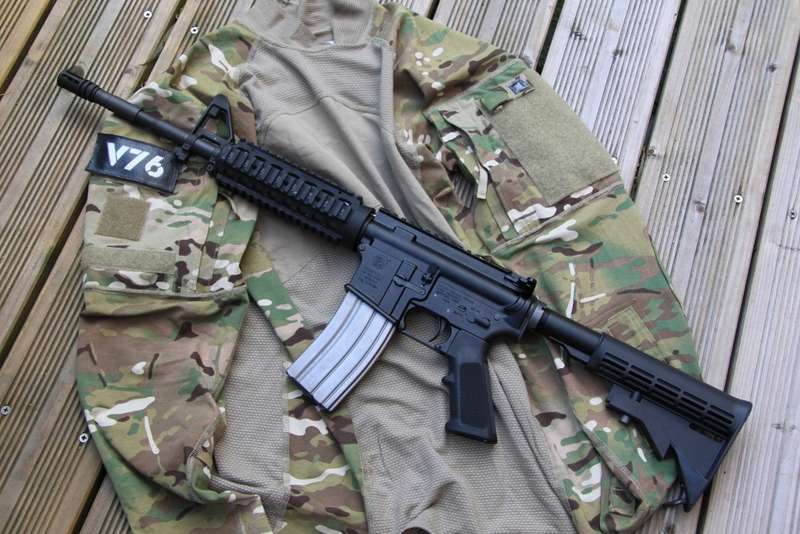
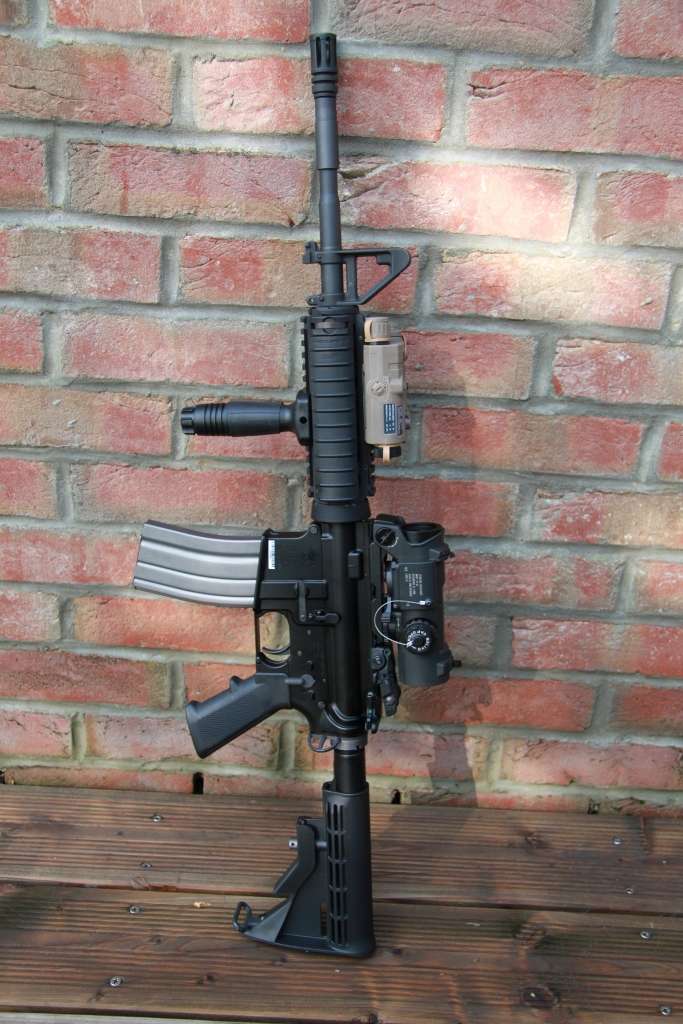
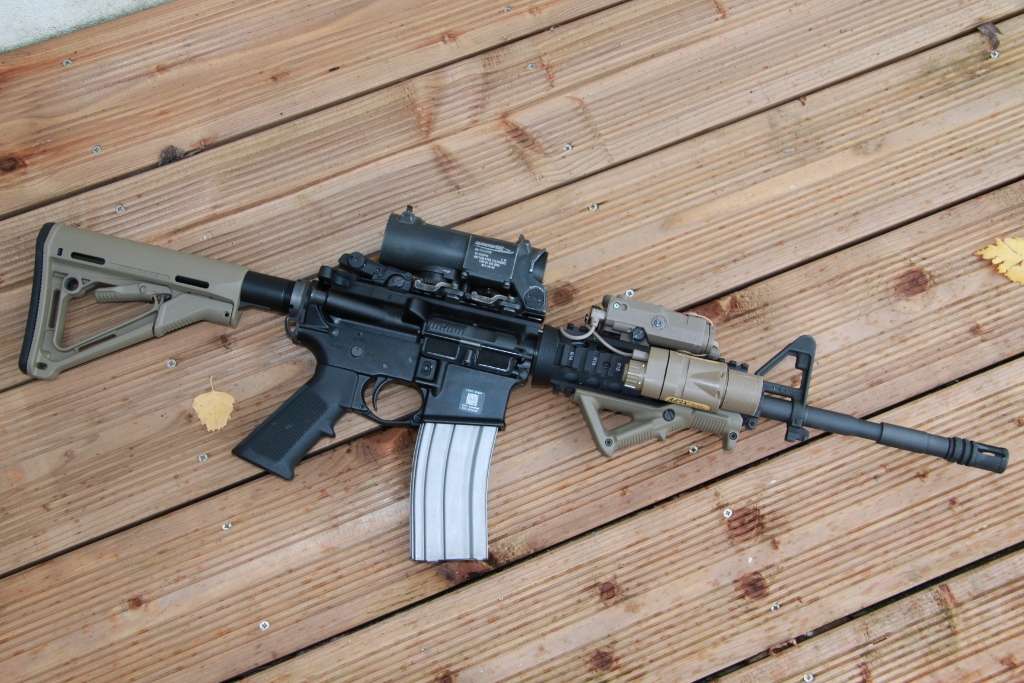
As I said before, this is a Viper Tech SR-16E3 MOD1 modeled after the Knights Armament SR-15/16 series of weapons. I actually own a real SR-15 MOD1, so I was looking to get an airsoft equivalent to practice and play with. Because this is the MOD1 specification, it does come with the URX 3.1 and 16` barrel just like on the real one. The markings on the upper receiver on the Viper are not consistent with the most current production SR-15s like mine, but they are correct to the current generation of SR-16s.
I will be dividing this review up into four sections: receiver, fore-end, internals, and overall fit and finish.
RECEIVER
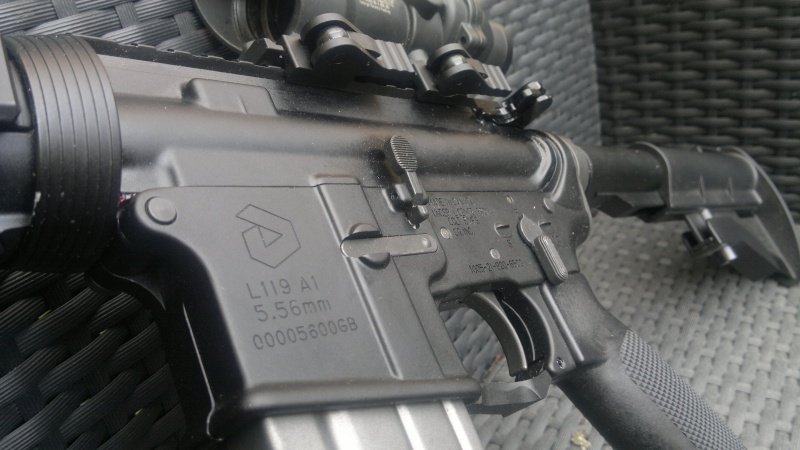
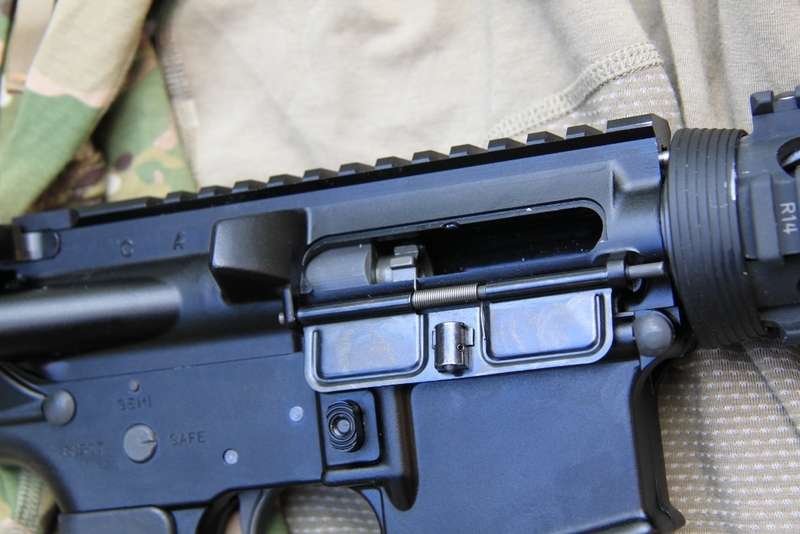
Let`s start off with the receiver. I must admit, this thing is nice. Everything is nicely machined and engraved. Vipers new flat black finish is almost exactly like it is on the real SR-15 and is so much nicer than their old, pearly finish. The only issue I have found is the forge line is still present on the front of the magwell. It hasn`t ever really bothered me, but I feel like by this point it needs to be next on the list of improvements. From looking at my SR-15, it`s clear that not even KAC was able to machine it off without leaving marks on the lip of the magwell. I was also able to find a couple small defects on the right side of the lower receiver. They aren`t that bad, and are hardly noticeable unless you are really looking for them. In fact, I didn`t even realize they were there until I started taking pictures. Overall though, it is definitely a nice receiver, worthy of the high price tag of this weapon.
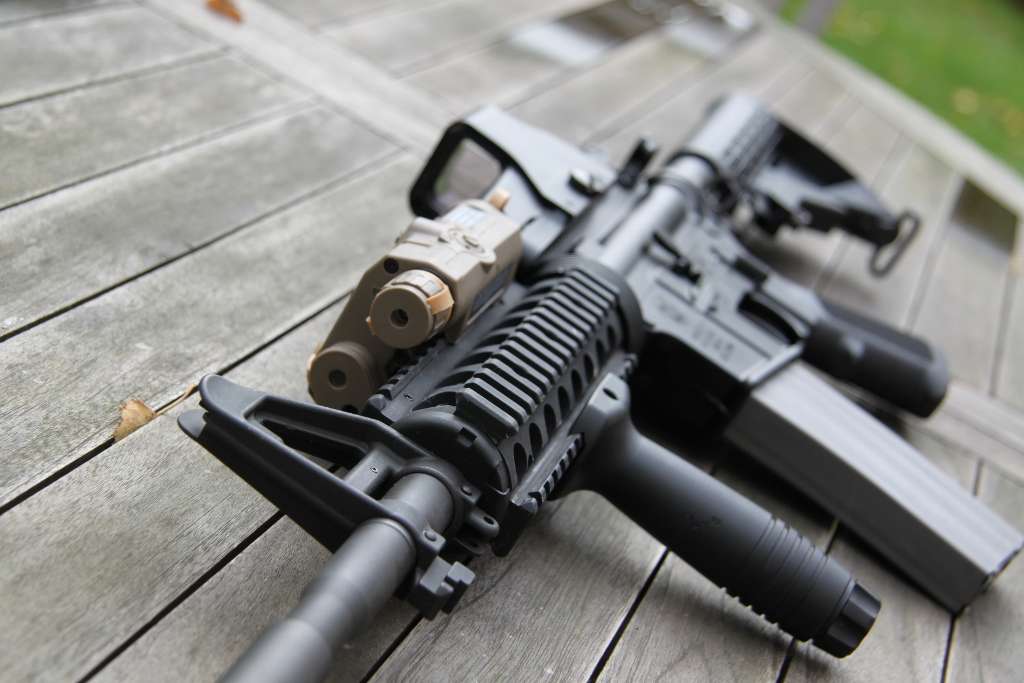
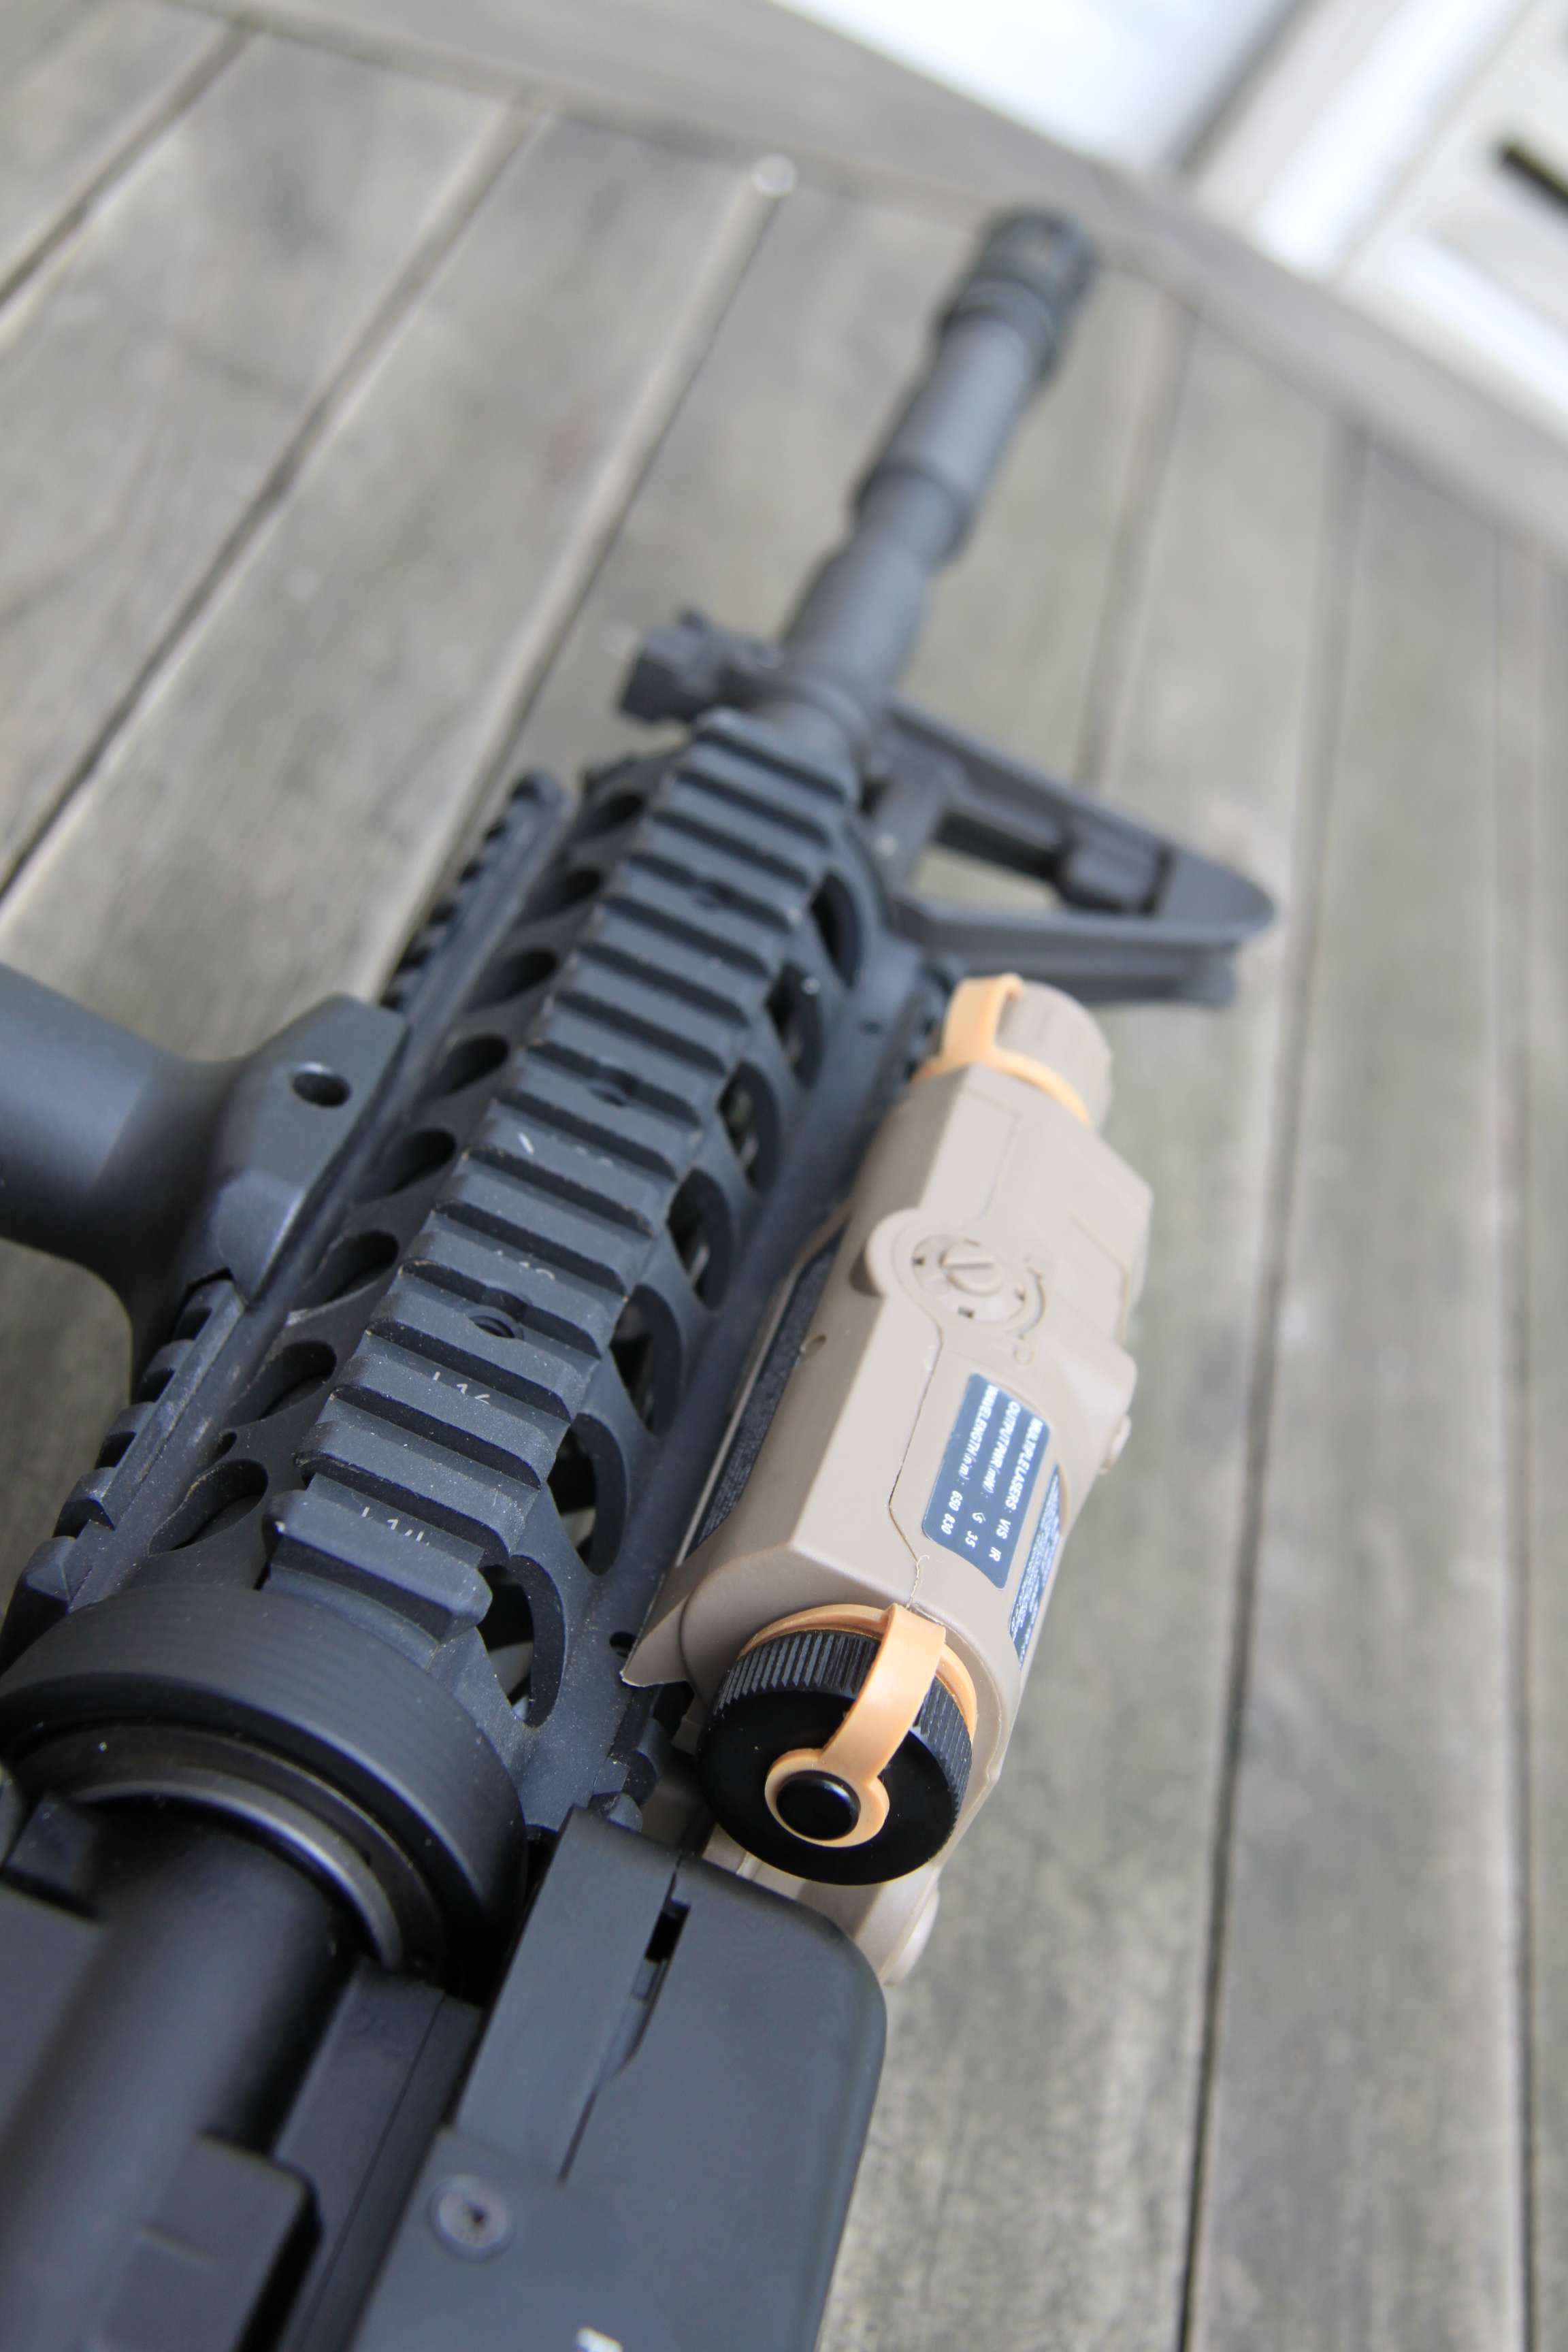
FORE-END
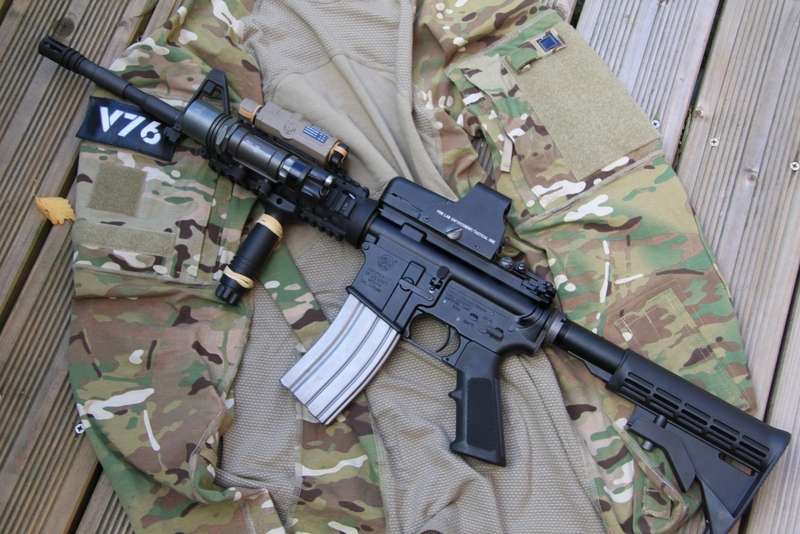
Like usual, this gun comes with a one-piece steel outer barrel, steel flash-hider, steel gas block and gas tube, and of course the URX 3.1. Everything is all very nice and solidly built as we have come to expect from Viper Tech. The URX 3.1 itself feels nearly identical to the real one on my SR-15. The only difference being the Viper Tech one is made from 6061, which is a bit softer than the 7075 a real one is made from. All this does is cause it to make a slightly different noise when touching the rail, the real one being a higher pitch, and Viper`s being lower. The finish is the same as that seen on the receiver, just like on the real one.
INTERNALS
The internals are the same design as 2012 models, and everything is just as tight and smooth as before.
I’ll give a quick rundown of everything inside the receiver.
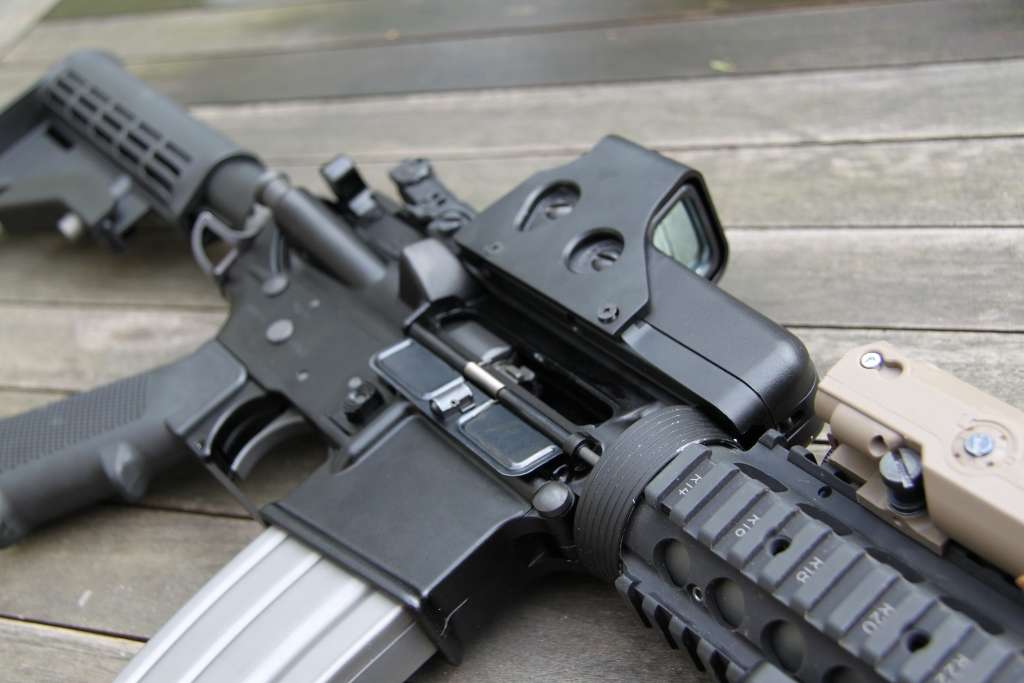
Trigger: The trigger assembly is full hardened steel. The disconnector specifically is oil quenched steel to ensure an extremely long lifespan. Firing Block: The GFPA ’11 provides more reliability and more consistency over a standard WA block. The firing pin is steel and even when the hammer is not cocked it allows you to insert a mag without problem. The bolt catch is steel and the retaining spring is just as stiff as my 2012 was. I will need to remove the steel spacer between the bolt catch and return spring to allow my ProWins to actuate the bolt catch. Bolt: The carrier is steel while the nozzle is aluminum. Overall the weight is very high. The nozzle still implements Vipers dual o-ring design to improve sealing and gas efficiency. The bolt is still slightly short stroked to provide better performance and reliability. This particular gun comes with the upgraded hard chrome carrier which reduces friction between the upper receiver and buffer tube for improved cycling. Charging Handle: The charging handle is machined from one piece of forged aluminum. New to the SR-16`s and current production Vipers are the steel charging handle latches. THANK YOU!!! Hop-up: Same as the 2012 design. The 2012 design employs the use of Vipers special hop up rubber and barrel extension that almost completely eliminates jamming while still providing great accuracy and range.
Overall performance is fantastic as always. Gas efficiency is just as good as my XM177 which can empty nearly 2 ProWin mags on full auto. The recoil is about on par with my XM, but when using the included EB mag this thing cycles so quickly and so crisply it feels like no other GBBR I`ve seen. Basically it kicks nearly as hard as the hardest recoiling GBBR I`ve ever seen (my XM177) and does it faster as well. It shoots like a real gun, :D.
FIT AND FINISH
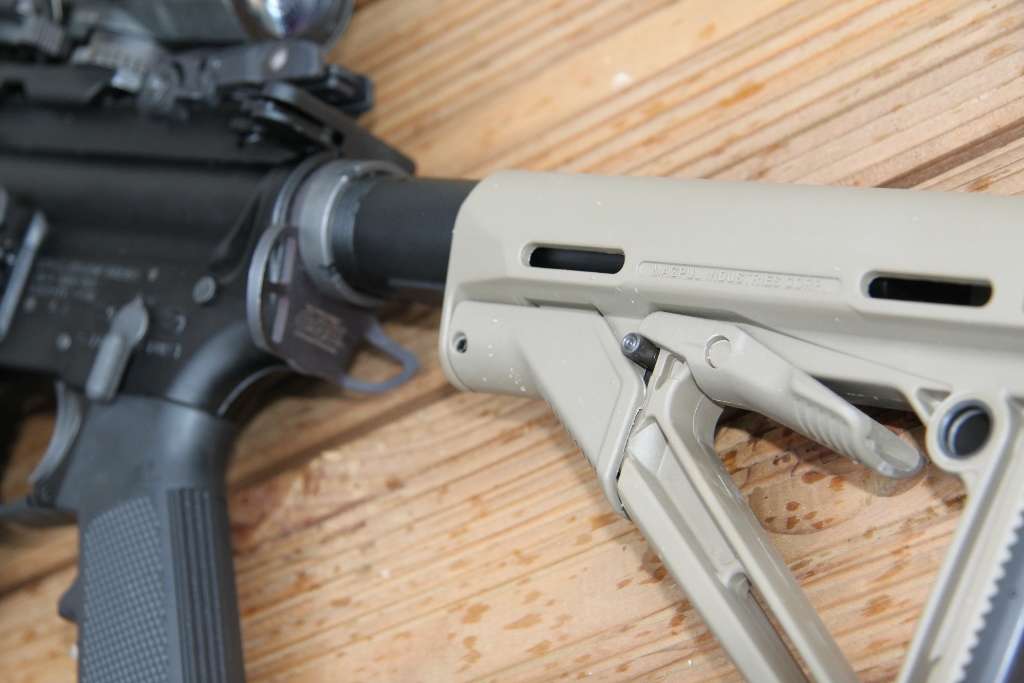
I feel bad about saying this, but as far as receiver wobble goes, the Viper is... better than the KAC. Seriously. On the KAC, there is some wobble between the upper and lower receiver. On this Viper, there is none. Aside from that everything is pretty much spot on compared to the real one. The finish on the Viper is a little rougher compared to the KAC which is a little smoother. The stock wobbles more on the Viper than on the KAC, but the buffer tube on the Viper is nicer. The buffer tube on the KAC is pretty trashy I have to admit. Although I believe those are just bought by KAC and fitted to their guns, but still, they suck. Overall though, the Viper Tech is pretty much spot on to the real version.
Overall, this baby is worth the price. I know it costs more than most airsoft guns, but once again Viper Tech has made something that is up there with the best of the best. This is just another reason why I believe that Viper Tech is the premier airsoft company.
Now here`s some pictures of my real SR-15 if you`d like a comparison. I`ll try and get some side-by-side pictures in the future.
This is going to be my review of the 2012 version Viper Tech XM177E1. Last year I wrote a comparison between the version 1 Viper and the 2011 model which can be found here: http://www.vipertech.com.tw/news_txt.php?num=35. It has been a long process trying to get this in to the United States, but it was eventually possible. I’ll be going over every bit of this gun, along with what it took to import this thing.
First off, the importation. I bought the gun from CWI Airsoft in Taiwan in September of last year which they promptly shipped out to me through EMS shipping, which here in the States is then handled by the Postal Service. Now, I live in Texas, but apparently the route the Postal service takes when importing from the West is to go through California. Specifically the Los Angeles sort facility and customs office. For me, this raised red flags immediately; I knew that the Postal Service goes through every single package that has to enter customs and from reading past experiences that the people in this particular area are not the smartest, nor the kindest when it comes to airsoft replicas. At this point it’s pretty obvious that my package was held and not allowed into the country. I called and asked why, and the response was “the orange tip was not permanently attached to the gun”. Now I also know that CWI painted and glued the flash hider onto the gun before sending it off to me. I was also told on the phone that it was able to be removed by hand WITHOUT any tools. Hmmmm, without any tools you say? Then why are there dents in the flash hider where someone obviously jammed a screwdriver in and torqued it loose? Anyway, at least they do not send held items off to be destroyed like they used to, it was just sent back to CWI after about a month. CWI then promptly sent it back to me after they liberally re glued the flash hider: so much so that it took me a torch to get it off yesterday. Nonetheless the LA customs stopped it again, this time because “paint is not permanent enough”. Basically the idea that I got from them is that unless the barrel is one piece of orange plastic, it is illegal in their eyes. So, it was sent back once again, but by this time CWI had gotten their license to ship through UPS so guess what happened next. CWI shipped it out through UPS and I had the gun within a week. Never again will I use the Postal Service.
I have to admit, CWI airsoft has been extremely helpful through this whole thing. Their customer service is fantastic and they are extremely understanding of the whole situation. Sorry for this whole wall of text, but I feel anyone trying to import a GBB into the county needs to know what can happen. At least I got the gun in the end, some companies would not be so nice.
THE GUN
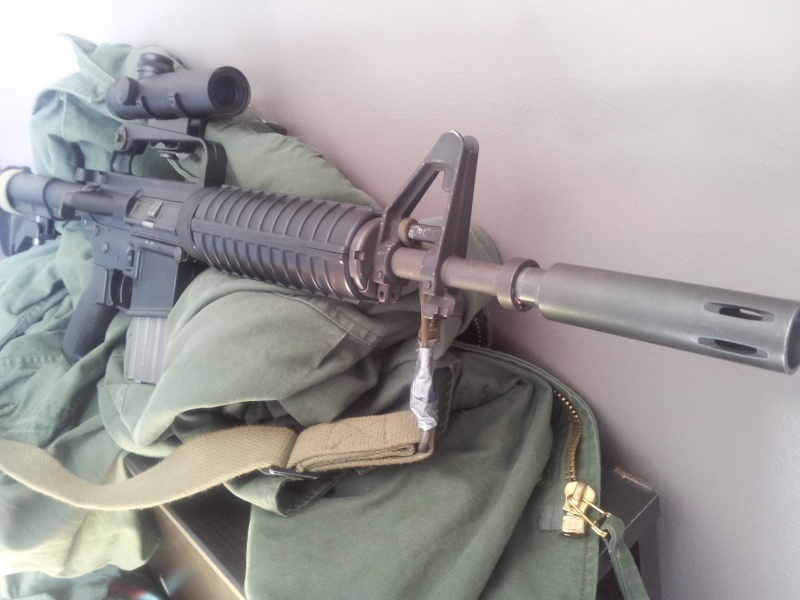
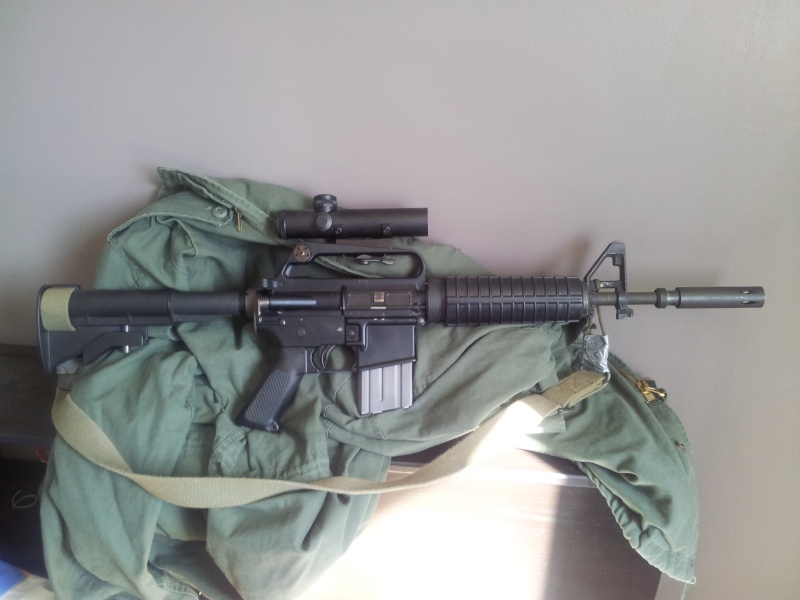
On to the gun. As I said before, this is a 2012 Viper Tech XM177E1, personally my favorite Vietnam Era weapon aside from the M653. Particularly this is a late version XM177E1 denoted by the fully fenced magwell, square bolt stop base, and the late version bolt stop. I’m not sure whether the metal stocks came on all E1’s, but I’ll be fine with the plastic one for now. When I was making decisions on which Vietnam Era gun to buy I considered the Bomber M653 as well, but now that I have this Viper in my hands I am truly glad I didn’t go for the Bomber.
I will be dividing this review up into four sections: receiver, fore-end, internals, and overall fit and finish.
RECEIVER:
The centerpiece of any AR-15 is the receiver, and this one is no exception. I have to admit this particular receiver is one of the nicest I have ever seen fitted to an airsoft rifle. It really is gorgeous. Every feature is beautifully machined and there are absolutely no signs of the manufacturing process that should not be present. The reason I say this is because on these older AR-15’s the forging line was always present around the whole of the receiver as these were mass produced on a fast timescale. Other than the forging line there are no marks what-so-ever, no defects, no tool marks, nothing. Unlike my 2011 which has many small defects throughout the receiver.
FORE-END:
As with all of Viper Tech’s products the barrel is a one-piece, steel structure that is stiff as hell. The front sight is cast steel like all other Vipers as well, but the one on this gun has had the bayonet lug cut off to fit the characteristics of the original XM177E1’s. The flash hider and gas tube are also steel as is expected and the slim plastic hand guards feel just like guns from that period should. Overall, very impressive. But hey, it’s a Viper Tech, did you expect anything else?
INTERNALS:
The internals are the same design as the 2011 model before it, but everything just seems tighter and better made. The only exception is the barrel extension which has been modified from the 2011 to prevent jamming even more.
I’ll give a quick rundown of everything inside the receiver.
Trigger: The trigger assembly is full hardened steel. The disconnector specifically is oil quenched steel to ensure an extremely long lifespan. I did notice that the hammer spring is not strong enough to fire MAPP gas like my 2011. I believe this is because the gun sat cocked for the last 5 months as that will surely cause this problem. I’ll get a new hammer spring and see if it fixes the problem. Firing Block: The GFPA ’11 provides more reliability and more consistency over a standard WA block. The firing pin is steel and even when the hammer is not cocked it allows you to insert a mag without problem. The bolt catch is steel and the retaining spring is much stronger than the one on my 2011. This created problems when using mags with weaker loading springs as they do not have enough force to push the bolt catch up. Simply removing or cutting down the retaining spring fixes this problem. Bolt: The carrier is steel while the nozzle is aluminum. Overall the weight is very high. The nozzle still implements Vipers dual o-ring design to improve sealing and gas efficiency. The bolt is still slightly short stroked to provide better performance and reliability. Hop-up: Same as the 2011 design with the exception of the barrel extension as described earlier. The 2011 design employs the use of Vipers special hop up rubber that almost completely eliminates jamming while still providing great accuracy and range.
Overall performance is even better than my 2011. Since everything on this gun is tighter and the tolerances are closer it all just works better together. The result is crisper shooting, more recoil, and more gas efficiency.
Overall Fit and Finish:
This is what really surprised me about this gun. I was expecting it to be a little better than my 2011, but boy was I wrong. There is literally no wobble between the upper and lower receiver, no wobble in the grips, nothing. The only this that does move is the stock, but that is completely normal. It really is amazing. It makes the gun feel many times nicer than any previous gas airsoft AR-15 I have ever held, and it really does easily compare with more expensive real steel guns. The finish on the receiver is something to behold. Viper Tech really did their research on these old guns. The finish is just the right color, a dark gray with a hint of green. The only real difference is that the Vipers receiver is anodized so it is a bit shinier than a real one, but still extremely nice. Overall, fit and finish is fantastic. Leagues ahead of any other airsoft AR-15 I have ever seen.
Now time for some extra pictures. I wish I had a better camera, but this will have to do for now.
Okay, so what I`m going to do is give ya`ll a complete rundown of the 2011 version as of 2/24/2012. I just bought it last week from ehobbyasia so this is the most current stuff; it may be different later on as Viper Tech likes to change stuff around mid production cycle. I will also compare with my old gen. 1 that I purchased within 1 month of the original release (so it`s the really old stuff).
Externals: (front to back)
Flash-hider:
Gen. 1 - Came with an orange plastic flash-hider, along with a black steel flash-hider. Thread size is real steel dimensions, so 12mm. Real flash hiders should fit.
2011 - Only came with the steel flash-hider that was spray painted orange. A bit of acetone and some time and it will be back to black. Thread size is still 12mm.
Outer Barrel:
Gen. 1 - One piece, all steel, looks exactly like a real AR-15 barrel. Has correct 5.56 markings engraved in the correct place.
2011 - Same as the Gen. 1, no change.
Front Sight:
Gen. 1 - Steel casting, exactly like a real AR-15 front sight.
2011 - Same as the Gen. 1, no change.
RAS:
Gen. 1 - Machined from aluminum, painted with high quality black paint, then laser engraved just like the original KAC version. Includes KAC markings on the inside of the heat shield and underneath the top of the top half.
2011 - Machined from aluminum. The top has been anodized black and has a very slick feel to it, exactly like the KAC version. The bottom piece is still painted like the Gen. 1. All of it is still laser engraved like the real version, but this one lacks the KAC markings on the inside that the Gen. 1 had.
Delta Ring:
Gen. 1 - Well, its a delta ring that would be just fine on a real gun. Can`t tell the difference from a real one. Spring is stiff as hell.
2011 - Same as the Gen. 1, but the spring is even stiffer. That just might be a because of use though.
Receiver:
Gen. 1 - Cold forged and machined from 6061 aluminum. It used the same tooling from the original 2008 Inokatsu`s so it is not completely correct if you look really really close. I honestly could never tell the difference. It is anodized black that kind of sparkles a bit in direct light, it`s hard to explain, but it doesn`t look like a the colt receiver it is supposed to be imitating. The machining is very nice, no defects anywhere. The inside of the magwell is very smooth from the machining, but the tooling marks can still be felt.
All the markings are laser etched on and are white. The markings are half Colt, half Viper. Look at the included picture, hard to explain. Features SAFE - SEMI - BURST markings.
2011 - Cold forged and machined from 6061 aluminum. The tooling has been d and most of the mistakes from the 2008 have been fixed. Again, I can`t tell the difference, that`s just what they said. It is again anodized black, but where the Gen. 1 was kind of sparkly, this one is not. The finish is magnificent, I can`t say much else. Where as the Inokatsu 2011 is more dull like the real thing, this is more shiny. Shiny isn`t really the best word for it because it is far from it, it just reflects more light. Unfortunately (or fortunately) there are defects from the forging and machining that can be found on the receiver (mostly the upper). They look like little tiny divots. Now, some might see this as a negative, and if you are looking for perfection it is; but this is how most real receivers are, so technically it`s more realistic. The magwell is also a bit rougher, signs of a quicker machining process. There is also milling lines around the bolt catch mounting area.
This time the trademarks are engraved onto the receiver. They are still the same markings as the Gen. 1, but damn the engraving looks nice. It`s nearly perfect, no rough edges at all. This one features SAFE - SEMI - AUTO markings though. The full length M16 has the burst marking instead of auto.
Pistol Grip
Gen. 1 - Plastic of sorts. Nice feel.
2011 - Plastic of sorts. Smoother than the Gen. 1, and attracts scratches more. Still feels nice.
Buffer Tube:
Gen. 1 - It`s a buffer tube, it`s machined and it works? I don`t know what else to say.
2011 - Same as the Gen. 1, no change.
Stock:
Gen. 1 - LE style stock on my 14.5 in. version. Wobbles a lot.
2011 - LMT Crane stock now comes on the 14.5 in. model. Still wobbles, but not as much.
Internals:
Hop-up:
Gen. 1 - Steel, uses AEG type barrels and buckings. Adjusts underneath the bottom rail section. The standard barrel is a 6.04 brass tightbore. It is next to impossible to take apart the hop up unit. The lips on mine bent after a while and caused misfeeding. The rubber wore out after a while as well and the lips of the rubber eventually tore off. The barrel extension is made of aluminum and showed very heavy signs of wear pretty quickly. Barrel extension is gold in color. Generally bad unit.
2011 - Still made of steel, still has a brass 6.04 AEG type tightbore. Adjusts underneath the bottom rail section. I have not tried to take it apart yet, and I will not attempt it until I absolutely have to. Let`s just assume that it will be hard to take apart. The rubber is completely different, the lips are now as wide as the steel lips of the chamber itself. They angle in toward the barrel and stop at the inner diameter of the barrel. What I am saying is they are very thick, ~2mm, and are designed to stop misfeeding and should not get torn off by jams and other malfunctions. You will have to buy replacements from Viper Tech though. The barrel extension seems to be made from steel this time and is a darkish brown in color.
Bolt and Carrier:
Gen. 1 - Steel carrier, aluminum nozzle, very heavy. The carrier is the same steely color as the outer barrel, the nozzle is goldish, somewhat like the barrel extension. The bolt features two o-rings to keep a good seal. The side-lock plate is held in place by a hex screw that has been subsequently loctited in place. Oh, and it`s also held in place by a very tight pressure fit. It`s nearly impossible to get this out without breaking something. The internals are negative pressure. The flute valve is made of brass and will break eventually, which sucked when it happened.
2011 - Steel carrier, supposedly the nozzle is steel as well. I`ll have to go get some magnets to make sure. Carrier color is the same, the nozzle is grayer, but still has a gold tint. Still has two o-rings on the nozzle. The side-lock plate is no longer held in by a screw, and will fall freely from the carrier which is great news. The internals are still negative pressure, but the flute valve is now made of steel rather than brass, and looks a bit thicker too.
Charging Handle:
Gen. 1 - Aluminum, machined. Very nice.
2011 - Forged aluminum and machined. Very smooth and pretty shiny. Looks and feels great.
Firing pin Housing:
Gen. 1 - Aluminum. Western Arms design I believe. I could still insert a mag with the hammer not cocked and no gas would leak, might just be wear though.
2011 (GFPA `11) - Aluminum. Allows you to insert a mag without being cocked. I`d rather not go into tons of detail here because their video shows it pretty well. The bolt catch has also been slimmed down to work with the new design.
Hammer and Spring:
Gen. 1 - Steel. Western Arms-ish design. The hammer spring only forces it halfway through the cycle, when it hits the firing pin it is just moving on its own accord. The hammer spring is decently hard, may need to upgrade for co2.
2011 - Steel. I`m not sure if it`s actual design has been changed, though it does now look like a real steel hammer. Due to the new firing pin design it does not travel as far as a real hammer or other GBBR hammers. Now though the spring does follow it until it hits the firing pin. The spring is also much stiffer than the Gen. 1, and should be sufficient for co2.
Sear:
Gen. 1 - Steel.
2011 - Looks to be oil quenched steel. Very nice and should be a lot stronger.
Selector:
Gen. 1 - Steel. Locks into place very well.
2011 - Steel. Also locks into place very well.
Buffer and spring:
Gen. 1 - Buffer is the same as a real steel version. Has a hard rubber piece at the end. Recoil spring is stiff, but still reasonable. Includes two plastic spacers at the end to short stroke the gun. Do not ever try to use the gun without these, it will cause major problems down the road. The bolt will still lock back even though it is short stroked.
2011 - Same as the Gen. 1, no changes.
That seems to cover all of it. I hope this helps anyone that is thinking of buying one. I know I have repeated some things that people have already said, but a lot of this has not been said. Having this much info would have helped me a lot when I was making the decision to buy this current one I have. I was so close to getting a 2011 Inokatsu, and honestly I`m glad I went with the Viper. They really have improved greatly from the first version.
I will try to have a bunch of pictures of the 2011 version soon.
If you have any question regarding this gun please don`t hesitate to send me a message, I will help you.
Gen. 1 Pics:
2011 Version Pics:
Last edited by Masada on 25 Feb 2012, 01:37, edited 3 times in total.